

A campervan solar kit should be sized around what happens after you park, not the maximum wattage printed on a panel. A weekend van running lights, phones and a compressor fridge needs a very different system from a motorhome supporting remote work, an inverter and several days away from hook-up. The right design balances daily consumption, roof space, battery capacity and the weather conditions you actually travel in.
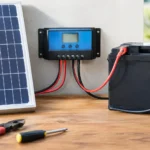
For dependable autonomy, treat solar as one part of a complete DC system. Panels collect energy, an MPPT controller converts it efficiently, a LiFePO4 battery stores it, and correctly rated cabling and protection hardware keep the installation safe. Add an inverter only where 230V appliances genuinely require one.
Start with your daily energy use
The most useful first figure is watt-hours per day. Record each appliance’s wattage and the realistic number of hours it runs. For 12V equipment, multiplying amps by 12V gives a close working estimate of watts. A compressor fridge may average 300-600Wh per day depending on ambient temperature, insulation and how often the door opens. A diesel heater uses modest power once running, but its startup draw and overnight fan use still count.
A practical load audit normally includes:
- compressor fridge and freezer
- lighting, USB charging and water pump
- diesel heater, roof fan and control panels
- laptop, router, camera charging and other work equipment
- inverter-powered loads such as a coffee machine or mains charger
A van using 700Wh daily has a manageable energy target. A van using 1,500Wh or more needs considerably more collection and storage, particularly when it is parked beneath trees, travelling in shoulder seasons or spending time in northern Europe.
Do not size solely for a perfect sunny day. Solar output changes with panel angle, roof shadows, temperature, dirt and cloud cover. In the UK, spring and summer solar can support comfortable off-grid touring; winter output is much lower and often needs support from alternator charging, hook-up or a generator.
Choose battery capacity before panel wattage
Battery capacity determines how long you can operate between good charging opportunities. A 12V 100Ah LiFePO4 battery stores roughly 1,280Wh of nominal energy. Allowing for inverter losses and sensible operating margin, it provides about 1,000-1,150Wh of usable system energy in many real installations.
For a campervan consuming 600-800Wh a day, 100Ah of LiFePO4 is a sound starting point for short trips with regular solar or driving. A 200Ah 12V battery is better suited to longer stays, regular laptop use and compressor refrigeration. It can provide around two days of practical autonomy for a modest 1,000Wh daily load before charging conditions become critical.
LiFePO4 is especially well matched to mobile systems because it offers high usable capacity, low voltage drop under load and long cycle life. Batteries rated for 6,000+ cycles can deliver a far better long-term return than lead-acid units, provided the charging settings, cable sizes and low-temperature protections are appropriate.
Voltage matters as systems grow. A 12V platform remains simple and compatible with common campervan appliances. A 24V battery system becomes attractive when inverter power and solar capacity increase, because the same power is carried at half the current. Lower current means more manageable cable sizes and reduced voltage loss. However, 24V requires compatible charging equipment and either 24V loads or properly specified DC-DC conversion for 12V appliances.
Campervan solar kit panel choices
Rigid roof panels are the default choice for most vans. They offer dependable output, a long service life and good value per watt. A 100W panel suits restricted roof layouts or small electrical demands, while 200W to 400W of rigid solar is a more capable range for a campervan with a fridge and regular off-grid use.
Panel technology and physical dimensions both deserve attention. High-efficiency monocrystalline, PERC and TOPCon panels help extract more output from limited roof area. TOPCon can be particularly useful where every centimetre of roof space matters. Confirm the panel footprint before purchase, including brackets, cable-entry position, roof vents, skylights and the clear path needed to open a pop-top.
Flexible panels reduce profile and weight, making them useful on curved surfaces or roofs where drilling is not preferred. Their trade-off is heat management and expected lifespan. A flexible panel bonded directly to a warm roof may operate hotter and produce less energy than a ventilated rigid panel. Use a mounting method that follows the manufacturer’s requirements rather than choosing by appearance alone.
Portable folding panels can be an excellent addition rather than a replacement for roof solar. They can be aimed at the sun when the van is parked in shade, but they require setup, secure placement and supervision. CIGS portable technology can perform well in diffuse light and partial shade, although the best option still depends on available storage space and your charging target.
As a rough planning figure, a 200W roof array may collect 600-1,000Wh on a clear summer day, but far less in poor conditions. Designing a system around the higher figure alone is a common cause of disappointing autonomy.
Why an MPPT controller earns its place
The solar charge controller is not a minor accessory. It protects the battery, controls charging stages and determines how effectively the panel output reaches the storage bank. An MPPT controller tracks the panel’s optimum operating voltage and converts surplus voltage into charging current. This is normally the right choice for campervan arrays, especially with higher-voltage panels, variable light or battery banks above a basic entry-level size.
PWM controllers remain an economical option for small, carefully matched 12V panel systems. Their limitation is that they pull the panel voltage closer to battery voltage, leaving potential energy unused in many conditions. For a serious campervan solar kit, the additional yield and flexibility of MPPT usually justify the cost.
Controller sizing should be based on the panel array’s maximum current and voltage, not only its advertised wattage. Check the controller’s maximum PV open-circuit voltage at low temperatures, its output-current rating, and the recommended battery voltage. For example, a 400W array charging a 12V LiFePO4 battery can produce more than 30A at battery voltage, so a 40A MPPT controller provides sensible headroom. Check the manufacturer’s figures for the final design.
Do not overlook inverter and cable sizing
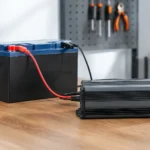
An inverter should be selected by the appliances it must start and run, not by an oversized headline rating. A 600W pure sine wave inverter is sufficient for laptops, camera chargers and many small mains appliances. Induction hobs, kettles, hair dryers and coffee machines can demand 1,500W to 2,000W or more, drawing very high current from a 12V battery.
At 12V, a 2,000W inverter can exceed 180A once losses are included. That requires short, substantial battery cables, correctly rated fuses, suitable terminals and a battery capable of the required continuous discharge. It is often more efficient to choose 12V versions of frequently used appliances than to build the whole system around high inverter loads.
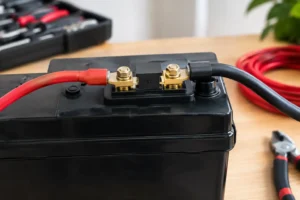
Every positive connection close to an energy source needs appropriate protection. This includes battery fuses, solar-array fuses where required by configuration, isolator switches and correctly rated circuit breakers. Cable cross-section must account for current, cable length and acceptable voltage drop. A system that works on the driveway can still fail under a sustained inverter load if undersized cables cause voltage sag.
Build for real travelling conditions
A complete installation should also consider alternator charging. Solar cannot guarantee full recovery after several cloudy days, particularly when daylight hours are short. A DC-DC charger can charge a LiFePO4 leisure battery safely from the vehicle alternator while managing modern smart-alternator behaviour. It turns driving days into useful charging opportunities and reduces dependence on perfect weather.
Mount components where they remain accessible, dry and ventilated. Keep battery cables short, route solar cables through protected entries, label isolators, and leave enough service slack to inspect connections. Before commissioning, verify polarity with a multimeter and programme the controller and charger to the battery manufacturer’s LiFePO4 charging specifications.
QuantEnergo can supply the complete system path, from compact 12V LiFePO4 storage through rigid, portable and flexible panels, MPPT regulation, inverters and protection hardware. Selecting compatible equipment as a system avoids the usual problems of mismatched voltages, inadequate charge current and undersized cabling.
The most capable campervan solar installation is not necessarily the largest one. It is the one that restores your normal daily use, protects the battery investment and still gives you useful power when the forecast is less generous than planned.




No comment yet, add your voice below!